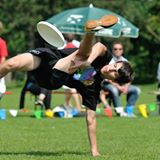
Kick Brushing 210

Kick brushing, much like all of freestyle, is an art form. After getting the basics you are ready move on to harder and more exciting kicks. It is my recommendation that even if you have not mastered the basics you should try trick kicks. In my experience I have found that trying things beyond your ability often solidifies the ability you have and accelerates your growth as a freestyler.

Outside Heel kick:

The outside heel kick is rather simple IF you hit the disc correctly. To perform this kick set the disc on an angle to your right or left side. (clock) Most commonly, this kick is done with the right foot. You will want to set the disc about shoulder height. Rotate your knee so that it points down toward the ground. This will bring your foot up towards your head. The outside of your foot is now facing forward. With the outside of your right foot touch the disc on the outside rim at four o’clock. With your left do the same thing only hit the disc at seven o’clock. Now, if you are brave you can change the angle. Hit the disc on the bottom of the rim at four and it will change. Experiment with it and you will be able to change the angle a little or a lot. Some people change the angle off the throw. It is best to attempt this with high angle.

Leg Over Kick:

The leg over kick is all about timing. It, in essence is just a regular kick. If you set a disc on a high angle in front of you, let it come down toward your foot like a regular kick brush. Moments before you are about to kick the disc jump up and kick your opposite leg over the disc then kick the disc with the intended foot. That’s it, nothing special here excepting the timing. That itself is rather hard.

Sole brush:

The sole brush is done with the sole of your foot. Hence, Sole brush. This one can be hard. It requires a bit of flexibility. Set the disc into the wind about head height directly in front of you. With your toe pointed, swing your foot up in the air, in the direction of the spin. Hit the disc just below the ball of your foot on the rim at about five o’clock ( for clock). The disc should end up in front of you.

Behind The Leg Kick:

The behind the leg kick can be done two different ways that I know of. One is with the sole of your foot, and the other is the top of your foot. With clock spin it is easiest to do this kick with your right foot. Set the disc to your left on an angle. Let it drift down towards the ground and kick with the top of your foot, behind your left leg at six o’ clock or so. The disc will either go up and to the right or straight forward. It depends on where you hit it. I find that depending upon the wind it is sometimes easier to jump then kick. Be careful not to kick your leg out from under you.
If you want to kick it with the sole of your foot, set the disc the same as aforementioned. Instead of just kicking behind your leg you can twist to the right swinging you right foot down with your toe pointed toward the ground. Hit it at five or six and there you have it. You don’t have to spin, yet I find it easier.

Inside kick brush:

The inside kick brush is dependant mostly on angle. First you will want your back to the wind. Next set the disc, from a rim delay, on a steep angle with the nose pointed towards the wind. . (Maybe sixty degrees, it depends on the wind) The set should be near the side of your body that you wish to kick with. Then give it a kick at six or so in the direction of the spin. Watch your face, a bad hit can result in a fat lip. You don’t usually have to hit it very hard a light tap will do the trick. I find that pointing your toe will help in gaining control. If you would like to practice on your own without a rim set you can try a two handed throw set. It works well.

There are many more trick kick brushes that can be learned. Practice and experiment. Much like all freestyle there are more ways to do it than have been invented.
Also, watch film there is tons to be learned in the playback.

The Flamingitosis

LustiWritten by Dan “Lusti” Lustiger

When I first looked at the flamingitosis I didn’t believe it was possible. But when I learned the flamingitis I knew that that trick was my next goal.
I bet I know what you’re thinking; flexibility is required to do that trick. NOT!!!!!
I’m not flexible at all and I am doing it. The key is the set.

Ok enough small talk…
Before you do the flamingitosis I recommend that you learn a few catches.
The flamingo, then to a flamingosis. And the flamingitis.
Once you learn the flamingosis and the flamingitis you need to mix them together. The set is very important. When you do the flamingitis you should look how far your hand can go to catch. If your hand doesn’t go so far you should make the set a little to the right so when you do the osis spin it will be easier to catch it.
Okay now make yourself the set. The set should start from the waist level and end at the ankle area.

Now, once you did the set, spin around fast to the opposite way of the catch (spin clockwise if you’re catching it with your right hand). Raise your right leg (again, if you’re catching it with your right hand) over the disc, lean on your non-catching hand and catch.
Tip: some people are more comfortable of doing it with a center nail delay set. You should be expert in both (rim and center) sets so in mob-ops and small jams you will be able to end the co-op with a great catch.
Another Tip: some people like me can only do the movement if they set a disc. If you can’t do it without a disc, don’t think you lost it.
Last Tip: work both indoors and outdoors. The wind can change your movement completely. Be patient.

What, are you still here? Go jam!!!!!!

Lusti

Wipers

You know people say if you get lemons…make lemonade. Such is the way I started doing wipers (vertical upside-down rings). On a very windy day I was trying to bash flat counter, and was getting frustrated because when the nose got up at all it would blow up above my head and travel behind me really far. This technique is great to practice when waiting for a fellow jammer who is late or chronically on “Frisbee time”;-).

To get good at vertical upside down “drags” you face the wind. Keep in mind that the topside of the disc is directly perpendicular to the wind. The beauty of this technique in heavy wind is that the topside has no rim and therefore no “sail” for the wind to grab and move drastically. Also picture a person whom you have seen pass rings to another: the disc can only move forward once you contact and “hook” it. What this means is that if the throws or self-sets are set in front of you, you must have great wheels and sprint past the disc and pull it forward with you since it is both vertical and upside-down and therefore falling rapidly.

Simply put once you hook the disc you cannot move it backwards to go forwards, so it is best to start with the disc behind or to your side. If the disc is behind you, when you hook it, and it is spinning rapidly 2 miraculous things happen. First of all the wind pushing against the top “glues” it to your nail allowing a slight pulling movement and a feeling of power unlike any other in the disc world. For now you are defying gravity and doing a unique ring technique which looks mind-blowing, and leads into upside down rolls and kicks that will absorb the energy you transfer well, without moving too far away or blowing above your head! The second thing that happens is that you DISCover against the spin and with the spin moves do not hit your body parts because the disc is hanging off behind you like a ribbon!

To get started all you need to do is hold an overhand grip in front of you so you can see your thumb at 12 o’clock. You are looking at a the bottom of the disc and the nose is pointed at the wind 5-15 degrees depending on wind speed and rate of spin. Really cock the wrist and BAMM: snap it up above head slightly and look for the wind to move it back slightly- your only task is to find the top of the rim and HOOK it- but the disc must be slightly behind you at either side or behind you within arms length. The further behind you start- the more dramatic it looks when you hook it and let the ZZZs glue the disc to your nail- and play, experiment with it. It will hang as you move into the wind or as you spin around dragging it and I can turn 3 times sometimes if the spin and my technique is flawless….with the disc just hanging there the whole time!!! AWESOME!!!! Try it you’ll like it….

When you pass the disc back and forth behind your back and/or through your legs…it looks like your hands are windshield wipers…hence the name-coined by Diego Gamboa who informed me I had not invented this technique…and had been doing what he called drags for years. Left hand overhand grip is actually clock right side up-so you will doing counter UD drags-but after a while the direction of spin will become meaningless to you unless you do combos with rolls and kicks and under the leg brushes. When the disc is dragging against it will stick at really slow rates of spin allowing you to pull it in front of you to a beautiful UD roll… With high spinning discs it is easy to pull in front to a UD flat delay…and do whatever from there. For the opposite spin-grip the disc as if you were going to throw an overhand upside down throw to your partner and hold the disc at your side with your hand extended straight away from you… keep the disc perpendicular to the wind and snap… As you get good at this you will find yourself longing for your partners to throw you something you can hook right out of the air. It is especially gratifying to have it vertical, behind you close to the ground, falling away from you so can pull off the most heinest move: “Back from the Grave”. This occurs when there is no possible way you can reach the disc to even pancake save it much less do anything with it. Then PRESTO all of a sudden you are in control Back from the Grave…and you have made super duper lemonade out of a testy lemon of a throw…and the judges pencils snap off in disbelief…

Jamie

Cove Pull


Cove Pull: With Clock spin, set the disc on the right side of your body. Now, reach behind your back with you left hand and pull the disc so it traverses behind your back from right to left, and then in between your body and your left arm. This is one of the prettiest against the spin pulls, in my opinion. Of course, unlike mine, an ideal cove would not touch the rim.

What’s a reverse pull?

The reverse pulls originated from the osis concepts. To understand the reverse
pulls you must also understand the osis. There is a true osis and a false osis.
The true osis must have a leg or body part clear the disc completely to execute
the move properly. Lets take a simple one. Reverse gitis pull! I set the disc
from my right hand spinning clock under my left leg flat set placing the disc to
my left shoulder. The left leg continues to rotate 180 degrees then planting
firmly then the right leg continues the rotation in the air while your right hand
slides cross body to the gitis position while the right leg MUST go over the
disc and then the pull is achieved.

Hint> keep your chin on your right collar bone while you look down your right
elbow and your right knee for the disc and set the disc where you want it! Stick
your finger in and pull. If you can keep your right leg up and swoop into a
grapevine set to a left handed scarecrow!!! That should wooo em!

Chip Bell
#advanced