Catch zones

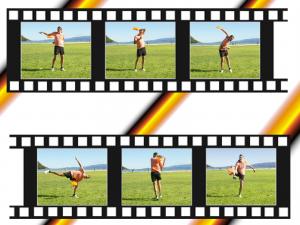
Film Strip CatchesAfter writing the poll, what is your bail catch?, I realized a discussion of catch zones was in order. As one hones one’s freestyle skills, one begins to realize that the disc can come in at any height, any angle, and any side of one’s body. As such, it pays to have at least one answer for every possibility.

This is where the concept of catch zones comes in – it’s a way to break down all the possibilities in order to reflect on what skills one may wish to develop.

I break down the zones as follows: ankles, knees, waist, shoulders, and head. Each of these has a right and left side, for a total of 10 zones.

So with that defined, the first step is to ask yourself, “what is your bail catch for each zone?” Here’s a worksheet to help:

Side of Body Left  Right
Ankles                                                                                                             
Knees                      
Waist                      
Chest                      
Head                      

Once the list is filled out, evaluate it with the following questions:

  1. Are there any gaps?
  2. Are these catches truly bail catches? Can you make them with both spins? Any angle?
  3. Are you satisfied with the difficulty level or your form for each catch?

For example, here is my list:

Side of Body Left Right
Ankles Chair Phlaud
Knees Under the Leg Under the Leg
Waist Behind the Back Triple Fake
Chest   Scare Crow
Head Behind the Head Scare Crow

The first thing that I notice from my list is the gap at Left-Chest. A great thing for me to practice is a catch in that zone, maybe a right handed scarecrow. Next, I notice on my right side I have more difficult catches than on my left. So, I could drill my left catches; or target one of the zones and start drilling a different specific catch. For example, a left handed phlaud for the left ankle zone. Lastly, I my Knee Zone catch on both sides could be improved with more difficult catches, like a flamingo.

This “zones” exercise can be useful for more than just catches. For example, takes, sets, air brushes, against the spin, UD, really any category of tricks can be examined in this way.

What zone do you plan to work on next?

How to Catch a Triple Fake, by Matt

In this brief video Matt demonstrates how to catch a triple fake. It’s a nice alternative to under the leg or behind the back for a disc that is in the waist zone. As a blind catch, it can be more difficult than it looks. With practice, it looks quite graceful.

To execute, do a self set or have someone throw to you. Watch the disc. Reach across your stomach and around towards your back. As you reach, spin your body around to propel your hand towards the disc. Keep you eye on it as long as possible. As you begin to lose sight, snap your body around faster and make the grab.

Matt’s key is to pivot on one foot. Then, a simple bend at the knee allows for adjusting to the height of the disc.

Matt Teaches the Flamingitosis Catch

The flamingitosis is one of the most challenging catches. To understand it, it helps to break down the name; Flamingo – Gitis – Osis. A flamingo is when one plants on one leg and catches the disc behind the planted leg. A gitis is a variation of under the leg where the disc is caught around the outside of the leg opposite the catching hand. So right hand catches on the outside of the left leg and vice versa. So, a flamingosis is catching around the outside of the planted leg with the opposite hand. An osis is when one spins away from the catch so body rotation moves the hand in the direction as the disc is flying. Check the links for more details on each. Now put it all together and you have a flamingitosis.

Of course Matt, being the incredible jammer that he is, decided to add a double spin before he caught it. This is not a requirement. To fully understand the body mechanics involved, watch the video. There’s even a nice slow motion section. After Matt’s second spin you can see how he looks over his catching shoulder for as long as he can before his body blocks the view. Watching the disc as long as possible is the key to making this catch.

Another thing I find helpful is falling into the catch. The fall is not required, but for me it opens the window just a little more. You can see in the video, it works for Matt as well.

Matt Gauthier Teaches the Flamingosis Catch

Matt Gauthier teaches us about the famingosis catch. This is one of the more challenging catches to master. Also, it has a intriguing look due to the unique body rotation involved.

First, some nomenclature. The basic osis catch is covered here. It involves catching behind the back as one spins away from the disc. A similar spinning away movement can be applied to almost any catch. In this example, Matt is showing us the flamingosis, which is a flamingo with the osis style rotation. There is also gitosis, chosis (chair osis), bad attitosis, and probably a whole host of others. So, take your favorite catch and try to add an osis to it. It can open a whole new world.

Now for the flamingosis. Set the disc up and then spin. If you spin to the left, as Matt demonstrates, then plant on your right foot, kick your left foot out, and reach behind your right leg with your right hand and make the catch. As you spin, watch over your right should as long as you can, then flip your head around quickly and watch the disc into your hand over the left shoulder. Matt points out that the motion is very similar to a phlard. So, one way to begin is by catching a pharld but move your hand to the other side of your leg. This will help you with the motion.

There are also some subtle variations here. For example, the raised leg could travel over the disc before the catch is made. Or, it could move into position before the disc is low enough for the leg to go over. Or it could never go past the disc flight path at all. All are valid but it changes the aesthetic. My guess is that, with a little creativity there are other possible variations as well. If you think of any, please share in the comments below.


Ryan Young Explains How To Make Your Gitis Look Great

Ryan Young explains how to improve the look of a leaping gitis. Many people learn the leaping gitis without considering form. In fact, that’s my style…for me it’s traditionally about making the catch, with no thought to it looks. As a result, I look all compact and hunched over.

Ryan takes his gitis to another level by focusing on the form. Basically, as I understand it, the goal is to keep the knees straight, point the toes and kick the back leg backwards as you leap. This creates straight lines and splayed out look that is pleasing to the eye. I am certain Ryan learned this leap in ballet and has translated it into the gitis catch. In the video, Ryan goes over warmup and how to practice the form, even before trying to make the catch. Thanks to Ryan’s inspiration, you may see me trying to improve my form.

Matt Gauthier Demonstrates the Osis Catch

The osis movement is one of the more difficult movements to wrap your head around. In this video Matt demonstrates the most basic osis behind the back (BTB) catch. So, what is an osis? It’s anytime your body rotation is moving in the same direction as the disc. As Matt demonstrates, a BTB is either static or you twist towards the disc to make the catch. For the osis, you must rotate away from the disc as you catch it. This makes for a very small catch window as your hand can only stay in the right place to catch for so long…your rotation will pull your hand away. It’s really all about timing. Also, as Matt points out, osis is a blind catch in a way. You have to watch for as long as you can over the opposite shoulder and then, at the last second, snap your head around to make the catch. Of course, unlike other blind catches, with the osis it’s ok to turn and face the disc as you catch it, watching in into your hand. 

One cool thing about osis is it can be added to most catches. A flamingo can become a flamgosis, gitis becomes gitosis, chair becomes chosis, and bad attitude can be a bad attitosis. All these catches are extremely difficult and can be quite beautiful to watch because they require precision timing and body mechanics. What’s your favorite version of the osis?

By the way, I’ve heard Chipper “Bro” Bell call it a reverse pull when you do an osis pull.

Jake Demonstrates Eating Crow

Eating Crow is a third world scarecrow. First, place the disc upside down in your mouth. Bite down on it so the rim is just behind your canine teeth. Bend forward and then toss your head back, throwing the disc up with a third world spin. As it spins count the rotations to get the timing. Now, catch a scarecrow. Time the catch with the disc rotation so the it is flat when your hand arrives.

Once you perfect this trick, then next question, what trick leads up to having the disc in your mouth. If you have an idea, let me know in the comments.


Bad Attitude

In this video, I explain how I catch a bad attitude. For another example, check out Lori’s video. The catch is useful one because it uses a unique body position where the player stands upright on one leg and catches the disc around the ankle of the other leg. This gives it visual appeal from a variety perspective.

The AttitudeBad attitude is named after the dance position called attitude, except it’s a bad version of it. I am the perfect example of how bad the attitude can be. My flexibility is limited so the window to make the catch is very small. Besides stretching, what helps me are two things. First I stand on, or jump from one leg and then bend at the hip to bring the catching hip upwards. This means I don’t have to bend the catching hip as far back. Next, I rotate so the catching hip forward which means I can get my hand around my foot and ankle just a little easier.

Sue StraitOf course when I do it, it’s not so pretty. But, when done properly, it can be quite beautiful. Here’s Sue Straight showing us a proper bad attitude. Don’t worry if you don’t look like Sue. The bad attitude is a fun, explosive, and surprising catch that will grab attention no matter your form.

Lori Explains How to Catch a Bad Attitude

Lori Daniels explains how to catch a bad attitude. It’s unique body position requires a level of flexibility and strength that keep many players from trying it. When executed well, it can be quite beautiful and graceful or explosive.

To perform a Bad Attitude, think of doing a quad stretch. Bend your knee so your foot comes towards your bottom. Then grab your ankle. The difference for the bad attitude is that you grab the inside of your ankle. Well, you don’t grab it at all, you reach around it to catch the frisbee. To open the window for the catch, bend at the hip on your planted foot, and squeeze your side, glute, and quad muscles on the elevated leg side. This will help you lift your hand as high as possible. The higher your hand, the bigger the window and the prettier the catch looks.